Challenge

chal-lenge: noun a calling to account or into question

Follow along as I challenge the tricks, tips, clever craft and decorating ideas and "simple" recipes that we clip, bookmark, and "pin" for trial at a later date.

Are they really worth the effort? Time (and I) will tell!


Saturday, June 30, 2012

Challenge: Week #3

I’m feeling like my regular haunts are not putting forth any creative material for my upcycling projects. I was in a bit of panic because I couldn’t find anything. I was headed down to the Hudson Valley to have some fun on a wine tour and wouldn’t have time to do any of that type of shopping. Maybe stop at some yard sales along the way? That didn’t sound like much fun to me. Although add a little wine and I might see things in a different light!

When I pulled into my daughter’s driveway, I could see that one of her neighbors had been cleaning out their back room. Several artist canvasses, some still wrapped in plastic, were piled up next to the dumpster ready to be taken away. I was sure I could find a project somewhere among them so I gathered up a few and tossed them in the trunk to take home with me. Dumpster diving wasn’t included in the contest rules, but I don’t think Mom will mind.

Sunday, June 17, 2012

Challenge: Week #2

It’s week two and we’re still going strong! I love this project Mom chose. She found this beat up old high chair at a yard sale. You can see that the arms are missing and it’s just covered with spattered paint. Obviously someone else took an old piece of furniture that was no longer useful in its original form and made a modification. I wonder how long it was used as a painting stool. It’s fun to see all the different colors of paint and imagine the rooms that were given a fresh coat of paint.


Always one to look beyond the obvious, Mom decided to freshen up this interesting piece with a new coat of paint (all one color this time!) and give it a new use. She has a green thumb and has many plants around the house. This unique plant stand provides a variety of height in her collection as well as fun visual interest. It’s the kind of thing that makes you say, “Hmm, why didn’t I think of that?”

Sunday, June 10, 2012

Challenge: Week #1


Well we did it! Mom and I both finished our projects on time this week. When we talked midweek I wasn’t sure it was going to happen. A week isn’t a very long time to find a treasure and develop it into a project and we were both feeling some pressure. Time will tell whether or not we can keep up the pace.

My project began with a set of Smithsonian souvenir cookie cutters. The set includes a star, flag, airplane, elephant and dinosaur. When I saw them in the store I just stared at them trying to figure out how I could use them. My daughter stepped up next to me and tipped me off to an idea: use the cookie cutters as a stamp.


I spent a day or two trying to figure out which stamps to use and what to stamp them on. I stopped by a second hand shop and found a white cotton dresser scarf which was just perfect. I decided to go with a patriotic theme and chose the star with red, white and blue paint. The stamping was really easy and only took me about 30 minutes to finish. In the end, I decided to do a little spatter painting to add a little interest (those are the blobs you see!). I think it adds a little interest. Cookie cutters come in so many shapes and sizes and I think this idea would work well for personalized curtains, pillows and even t-shirts. There are so many possibilities to ponder.

Tuesday, June 5, 2012

Mommy and Me

So a whole month has gone by without a project or a post from me. That’s not to say that I have had a lack of inspiration or challenges to overcome. My projects have just been piling up all around me! Spring always brings a flurry of activity trying to get the yard in order as well as an increase in my travels. My paid job has been a challenge lately too as I just try to keep up. It saps up a lot of my energy and that’s just not right!

Speaking about traveling, while visiting my mom this week-end I came up with a joint challenge. I thought this time around I would choose a partner to keep myself motivated. Have you ever heard of up cycling? It means to change an item either old or new to give it a new use or purpose. I have been intrigued by some of the ideas I’ve seen floating around and want to give it a try. My mother is the queen of upcycling. She can take just about anything and turn it into a work of art. I’m not sure I’ll be able to keep up with her but I’m going to give it a try.

Sunday, April 22, 2012

Old Books

I don’t know what it is about old books that attract me. Maybe it’s the worn covers in a variety of colors that feel so soft in my hands. Or maybe it’s the interesting topics and titles like “The Mind of the Adolescent Girl” and “Commodore Hornblower”. Maybe it’s the nostalgia of an old text book like the Dick and Jane books in elementary school. Anytime I stop at a yard sale, attend a book sale or visit an antique shop, I always check out the old books. I do actually read some of them but mostly I like to decorate with them. I love to see stacks of old books on desks and shelves. The sight of them is so warm and inviting.

Old books are receiving a new life these days in the crafting world. Maybe it’s all part of the repurposing movement. A local bookstore is sponsoring a book crafting contest (www.stompinggrounds.com). I can’t wait to stop by and check out the entries. In anticipation of the event, the library held a book crafting workshop. The session was unstructured which really freaked me out, but I managed to pull myself together and decorate a little box. It was fun to see the projects the other participants created.

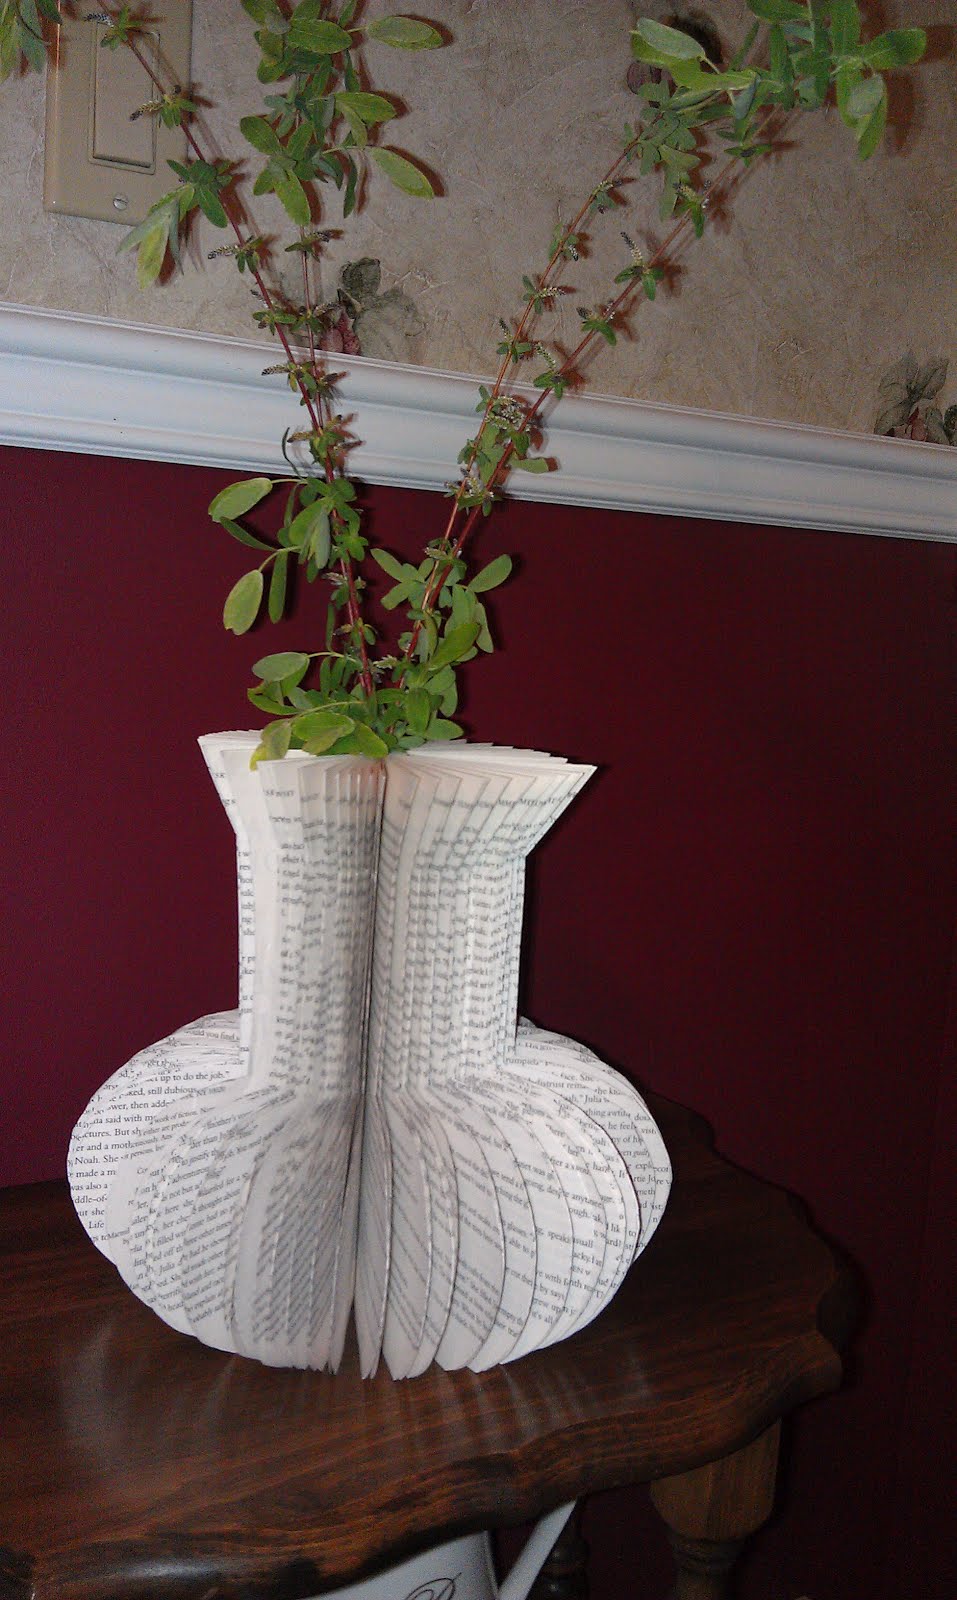
My interest piqued, I started to search online for more book crafting ideas. That’s when I came across the instructions for a book vase. It looked pretty simple and I decided to give it a try. I had just dropped off a load of books for the library book sale but another look around turned up a romance novel that was passed on to me. I really have to think hard before I choose a book to “use creatively”. I’m sorry, any book entitled “The Summer I Dared”, deserves to be cut up and it was an easy choice.

The instructions are simple. Cut your design out of a piece of cardboard. Transfer your design on the pages, cutting out three or four pages at a time. The instructions said to use a craft knife but I found that scissors worked much better. Once all the pages are cut, it’s time to cut off the cover. Make sure you leave the spine of the book intact. Glue the first and last page together and separate all the pages. Voila! You have a book vase! The center is pretty small, but a stem or two fit quite nicely in the center.

This was a fun little project and only took about an hour. A collection of a few different designs would make a nice grouping on a table. You can be sure I’ll be looking for similar titles at this year’s book sale to increase my collection.