Challenge

chal-lenge: noun a calling to account or into question

Follow along as I challenge the tricks, tips, clever craft and decorating ideas and "simple" recipes that we clip, bookmark, and "pin" for trial at a later date.

Are they really worth the effort? Time (and I) will tell!


Saturday, September 11, 2010

Hypertufa: Lightweight Artificial Stone Pots


Okay Martha Stewart let’s try it again. While looking through Martha’s Living Magazine, I came across directions to make these beautiful stone planters. The suggested materials and technique were meant to create a planter that looks like stone without the weight of stone. The molds pictured in the article appeared to create interesting and unique planters. My mother read the same article and wanted to give it a try.

Between the two of us, we gathered the materials: a variety of molds, cooking spray, cement, peat moss, perlite, rubber gloves and a mixing container. Common enough materials but it did involve a trip to Lowe’s and a very heavy, dirty bag of cement. Materials gathered, we read and reread the directions. Should the mix be the consistency of cottage cheese or cake batter? Martha said cottage cheese so that’s what we did. Filling the molds didn’t take much time. It was actually pretty anti-climatic, especially considering the time it took to gather all the materials. We packed the mixture into our molds with a minimal of fuss. Once filled, the pots were covered with a tarp to cure for 24 hours.

We waited the required 24 hours and then began to unmold our creations. The cooking spray had done its job and the molds released without a problem. In the interest of creativity, one of us (not me!) had filled the mold very loosely and these pots did not have enough strength to hold themselves together. We did hold out some hope that once the cement had fully cured, the stability factor would increase although it didn’t seem likely. The pots still had a few weeks to fully cure before we could really put them to the test and make our final judgment.

About two weeks passed before we checked our pots again. Now we could pick them up without any crumbling but they still didn’t seem very stable. Next it was on to the water test. After all, if the pots were to be useful they would need to hold plants, soil and water. I poured the water into the first pot and it drained right through the bottom without hesitation. As I picked up the pot it totally collapsed, creating a pile of soft, crumbled cement. None of the pots were successful, even as nonfunctioning pieces of art. I dragged them all up to the stone wall, dropped them and watched our creations disintegrate before my eyes.

I suppose we could use what we learned during this process and start over with new pots. But then again, I see Big Lots is having a sale.

Sunday, August 29, 2010

Neighborhood Challenge


I spent my morning Saturday as part of a totally awesome challenge. I work in community development in a small city in the Finger Lakes. The city has its challenges as do most small cities in upstate New York. As part of a new initiative, the city government has developed a new department called the Office of Neighborhood Initiatives of which I am a part. Our mission: To build confidence and pride in Geneva's neighborhoods through collaboration, education, and thoughtful design.

For our first project we challenged neighbors to come together and propose improvements to their houses and yards that when completed as a group would enhance the curb appeal of the street. The greatest challenge to the neighborhood was actually to learn to work together and not about the physical improvements. Paint fades over time but a feeling of neighborliness and good will can last a lifetime.

It has been a “challenge” on the part of the office staff to coordinate these repairs, etc. and to create the appropriate design for each house. Being the “taste police” can be difficult and we have seen some interesting paint color choices. But it has been fun and rewarding watching these three groups of neighbors work together to get their projects completed. I have heard from so many of them that they are happy to have met some really nice neighbors that they would not have met otherwise. Interestingly, people in the city tend to keep to themselves.

The city is also home to a small liberal arts college. Each year the freshmen are required to spend two hours helping out in the community. This practice acquaints them with the city and its various agencies and also acts as an introduction of the students to the residents. This year we requested some student workers to help with our neighborhood projects. I picked up my two groups of students and off we went. I dropped the first group of three exchange students (from Germany) at the home of an elderly couple. Their task was to paint the porch. The second group was charged with planting trees, shrubs and flower boxes.

The interaction between the students and the residents was amazing. The students took instruction well and got a lot of work done. The residents worked alongside
them creating a lasting good impression on the students. The elderly couple was so amazed that young people from another country would help them paint their porch. At the end of the job, the 84 year old man came out with glasses with ice and poured us all a drink. So sweet! A neighbor asked that a photo of the tree planting group be taken with another to be taken in four years when the students are ready to graduate. Several students asked to be called to volunteer on future projects.

My day began as just another day of work but ended up being a totally exhilarating and inspiring experience. I feel fortunate to have been a part of this wonderful project.

Friday, August 20, 2010

Twig Frame


Are you one of those people who walk through gift/craft stores thinking that you could make the items for sale on the shelves? I’ll admit that I am one of “those” people. It isn’t that I don’t appreciate the creativity and time it takes to create, but some things just look so darn simple. In the end, I don’t purchase but go away thinking that some day I will make that such and such.

I was recently in a little Adirondack shop when some little watercolor paintings done my Suzanne Cavanaugh caught my eye. Now I know I can’t do anything like that (yet!) so I bought two of them. The paintings were matted but not framed. The subject matter was just perfect for a twig frame. Now those look really easy, don’t they? Back to camp I went to gather the necessary supplies. It wasn’t difficult to find birch bark along with birch sticks and twigs on the ground. I knew I would be bringing this all back to the Finger Lakes to work with so I tried to find a variety of sizes and shapes. It did seem a little silly to load up the truck with sticks and bark but birch trees are not as easy to find here.

Once home, I laid out my materials and started to think. Tom graciously made me a frame base from which to start. I have to admit that I had no idea what to do. I searched the internet for ideas and came up with a simple twig frame said to be suitable as a children’s craft project. If a child could do it, I thought I could manage. I measured the sides of the frame and cut the sticks a few inches longer. It was a little difficult to make the first tie and I wondered how little child fingers could hold it all together and make a knot at the same time. Maybe with an extra set of hands which I wish I had!

With all four corners tied, it was time to make a decision about the base. I thought it would look interesting to wrap the frame with birch bark. I didn’t have any pieces large enough so I soaked the bark in water and peeled it apart. There were several layers of bark in one piece. I didn’t know that. My one piece of embellishment was a band of small twigs across the middle. Not fancy but a nice little touch.

I am pretty pleased with my little frame but realize how difficult it can be to make simple looking items. I have a new respect for anyone who can craft Adirondack furniture and accessories.

Saturday, August 7, 2010

Lavender


I’m sure that I have experienced lavender in some way over the years but I don’t believe I ever acknowledged that experience. My first real exposure to lavender came when I visited my local spa for a massage. I was in a peacefully decorated room surrounded with the most fresh and delicate scent. Of course that was the scent of lavender. I have been a fan of it since that time.

A few years ago I had an empty spot in my garden and chose two lavender plants to fill the space. They did surprisingly well and produced an abundance of flowers. Last year I left the blossoms on the plant because they were a pretty addition to the garden. Over the winter, I ran across instructions for making bath sachets using lavender flowers. The instructions were simple: place dried lavender flowers and Epsom salt in a little pouch made from cheesecloth. The cheesecloth is meant to keep all the dried flowers from clogging the tub drain. I waited all winter and spring before I could harvest my own crop of lavender for this craft project.

Once the crop was harvested, it was time to gather supplies. I cut the lavender and set it out to dry and then pulled the dried buds from the stems. It smelled great! Instead of making cheesecloth bags, I decided to recycle my silk teabags. I split them up the side, filled them with lavender flowers and sewed them back up. Of course they were too small to include the Epson salt but it shouldn’t be a problem just sprinkling that into the water. I was right, it wasn’t a problem. What a lovely soak I had with my lavender tea bags and Epson salts.

While I was thinking about lavender I decided to do a little research on the subject. I discovered that Queen Victoria of England made lavender popular across England. She used it to wash floors and furniture, to freshen the air and had it placed among the linens to freshen them. Queen Elizabeth I drank lavender tea to help ease her migraines. The French continue to send baby lambs to graze in fields of lavender so that their meat will be tender and fragrant. Lavender is actually a member of the mint family and is close to rosemary, sage and thyme in its characteristics. I have seen containers of dried lavender in cooking stores but have never thought to use it in that manner.

Curious about the culinary uses for lavender, I did a little research.
A lavender sorbet recipe immediately caught my attention. The recipe calls for sugar, water, lavender flowers, lemon juice and vodka (to keep the frozen mixture soft and smooth). It was a simple enough recipe to pull together. Oh my, what an interesting dessert. It seemed like I was eating pure sugar mixed with scented lotion. To give it a fair try, I nibbled on the sorbet over a few days. Give it a try if you have an adventuresome palate. It may actually be the perfect dessert because it satisfies your sweet tooth while soothing your senses.

As for me, I think I’ll keep lavender out of my kitchen and in my bathroom.

Friday, July 23, 2010

Berry Picking


It’s berry picking time in the Adirondacks. At least it appeared that way to me during my recent visit to our camp in Loon Lake. The road into the camp is bordered by raspberry bushes that were showing spots of ripe red berries. On my walk down to the lake I also noticed a neighbor’s front yard filled with blueberry bushes and a crop just ripe for picking. I have to admit to sampling a few berries just to make sure they were ready

Seeing these wild berries reminded me of the summers my mother would load up the car with buckets and bring us all out to pick blueberries. I just hated that time of year. I moaned and groaned the whole time and rarely picked more than a cup of berries. It was so disheartening to hear the drop of those small berries in the bucket – plunk, plunk, plunk. I was told that we could go home when I had picked a full quart. I never could pick a quart but I got to go home anyway.

Feeling a little nostalgic, I decided to try my hand at berry picking. Maybe I would have more success as an adult. I donned my sun hat and equipped myself with a variety of cups and a basket to help me carry what I hoped to be lots and lots of berries. Up to the power lines I headed where there are always lots of blueberries to be found. It was a beautiful day. The sights, sounds and smells were mesmerizing and I found myself pausing to take deep breaths and marvel at the scenery.

I was encouraged when I immediately found a few bushes and picked a handful berries. Unfortunately, that was where my luck ended. Up and down the path I went searching for more blueberry bushes. Not finding any, I decided to switch tactics and pick raspberries since they seemed so plentiful. Wouldn’t you know, as soon as.
I made that decision the abundance of raspberries seemed to disappear before my very eyes. The most accessible bushes no longer offered me juicy berries to pick. The best berries were now located deep in the tangle of thorny bushes just out of reach. I couldn’t help but think of Brer Rabbit in his little house in the briar patch. No way was I going in there!

True to my younger self, I not only didn’t pick a quart of berries, I didn’t even pick a cup! There has to be a lesson in this experience. I think that it may be that desire for an object is directly related to the ability to obtain it. The berries within my reach were just not good enough while the ones just beyond were the absolute best. Well anyway, I brought my mother my meager offering. After all, it’s the thought that counts!

Monday, July 12, 2010

Sunscreen


In anticipation of my trip to Florida, I went in search of sunscreen. We all know how important it is to use sunscreen. No more carefree days on the beach! The benefit of sunscreen is measured by a sun protection factor (SPF). The SPF is the amount of ultraviolet radiation required to cause sunburn on your skin with the sunscreen on. Therefore, wearing a sunscreen with an SPF of 30 means that your skin will not burn until it has been exposed to 30 times the amount of solar energy that would normally cause your skin to burn.

Anyway, I found a 15 SPF lotion and a 30 SPF lotion in the bathroom cabinet and decided to test if there really is a difference between the two. According to the above statement, the 30 SPF lotion should allow me to be in the sun for twice as long as the 15 SPF lotion before my skin starts to burn. The weather for Saturday called for a sunny 90 degree day. It sounded like the perfect day to conduct a test.

My legs don’t get much sun so I decided to use them as my canvas. To make things as fair as possible, I alternated the application of lotion on each leg: 15 SPF on the top of one, a strip of skin with no lotion and then the 30 SPF. I applied the lotion alternately on the other leg. With my hams all protected, I settled myself on the deck with a book and some iced tea. Within an hour the sky clouded up and it started to rain. So much for that test! I noted that after an hour, there was no sign of sunburn on any part of my legs with sunscreen or otherwise. I suppose that means I can stay out at least an hour without any sunscreen at all without any adverse effects. I’ll have to try this test again when the sun decides to shine for more than an hour at a time.

Anyway, it seems there is more to protecting your skin than simply lathering on a sunscreen. According to Whole Living Magazine, sunscreen eliminates only about 55 percent of the damage to your skin caused by UV rays. Apparently eating right and reducing stress helps your body form an internal sunscreen. On the list of beneficial foods are spinach, tomatoes, oranges, apples and coffee. At first glance this article seemed to be testing my limits of gullibility. I realize that I am greatly influenced by what I read. After all, if it’s in the newspaper it must be true! But if you think about it, this theory does make sense. Sunburn is an inflammation of the skin. Therefore, if you load up on antioxidants which help reduce inflammation, the effects of sunburn can be limited.

I wonder how many bowls of spinach I will need to eat while I am at the beach in Florida.

Sunday, June 6, 2010

Pasta


This week-end was Italian Cooking Week-End at the New York Wine and Culinary Center. Tours of the Barilla pasta plant in Avon were a part of the festivities. Always game for a factory tour, I convinced my daughter to come along and off we went. One of the first things we did was sign a confidentiality agreement. We chuckled about being approached by a Mr. Slugworth character asking to buy Barilla pasta secrets from us. Stay away from the chocolate river!

We learned that the people of the northeast consume the most pasta in the U.S. and that spaghetti and penne are the most popular forms of pasta. Our Barilla tour guide informed us that their product was made with only the best semolina which is evidenced by the golden color of the pasta. I could tell you more, but I wouldn’t want to run into a Barilla thug in a dark alley. I’m partial to keeping my legs intact.

Have you ever wondered if there is really a difference in pasta brands? After my tour I decided to enlighten myself and challenge the Barilla brand to determine if it really is as good as it claims. My experiment began with the choice of three pastas in addition to the Barilla. I chose a box of Ronzoni, another brand name; a box from Wegman’s, a local grocery store chain that prides itself on using only the best ingredients; and a box from Aldi, a low-price grocery store chain. The Barilla brand cost $1.29, Ronzoni $1.39, Wegman’s $.89 and the Aldi brand $.59 all for a one pound box.

The nutritional values of all the brands are comparable with the same ingredients being used in each brand. The only difference between the brands is the amount of sugar added with Barilla having the least at 1g and the Wegman’s and Aldi brands weighing in at 3g. There are 10 more calories per serving in the brands using more sugar.

I kept the cooking technique as consistent as I could: the same pan, 4 cups of water, ¼ teaspoon of salt, 1/3 cup of pasta cooked for 8 minutes. I have a gas stove and did not change the heat setting throughout the experiment.

The Barilla pasta is a nice golden color, has little ridges to really hold the sauce, is a consistent size and has a nice hearty texture and a good flavor that would hold up well to a sauce. The Ronzoni and Wegman’s brands are pale in comparison. The elbows are smooth and the pasta does not have a consistent size. The Wegman’s brand is the lightest in color and is almost tasteless. The Ronzoni was just a little bit better with a bit more flavor. Surprisingly, the Aldi brand is also a golden color and is quite flavorful although the pasta is not a consistent size.

Taste, taste, taste. The decision has been made. The Barilla brand with its hearty texture and flavor was the best overall pasta I tested. However, the Aldi brand for less than one half the cost of the Barilla brand is a very close second. The result was not at all what I expected. Price is certainly not an indicator of quality and you shouldn't be quick to judge based on price.

You’ll have to excuse me now; I have quite a bit of pasta to finish eating. Too bad I didn’t test jarred pasta sauces too. Bon appétit!

Monday, May 31, 2010

Canoeing: Plant a Seed and Hope it Grows


Let me preface my post by saying that I just love being near, on, or in the water. I don’t know if that love comes from my mother taking the family to the beach all summer long or something to do with a past life. In any case, I don’t discriminate between bodies of water. Creeks, lakes, rivers, oceans: I love them all equally. There is just something so peaceful and renewing about being around water.

I have been lucky enough to live fairly close to bodies of water my entire life. Lake Champlain and the Saranac River were very accessible during my “growing” years. Life in New Jersey brought the Atlantic Ocean and our house near Buffalo was about 10 minutes from the shores of Lake Erie. Our move to the Finger Lakes region brought a new wealth of lakes, ponds and the Erie Canal to explore and enjoy.

My life in the Finger Lakes and the enjoyment in the views of the lakes started me thinking about owning a canoe of my very own. The thought of paddling in the waters of the Finger Lakes region just sounded so relaxing and soothing. Just think of the near-silent dipping of a paddle in a calm body of water propelling you forward into the sunset enjoying the scenery and wildlife all around you on a beautiful summer evening.

And so the challenge begins. I planted the seed of owning a canoe with my husband 15 years ago when we moved to the Finger Lakes. I explained how nice it would be to get out onto the water and enjoy the natural resources around us. I thought he was listening until he went out and bought a very nice 17’ Bayliner motor boat. It was a beautiful boat, but it was loud and smelly. Certainly not the calm and peaceful experience I thought of with a canoe. We sped around several of the Finger Lakes and even brought it up to the Adirondacks a few times. Our youngest daughter learned to water ski; something impossible to do with a canoe. But the boat just got to be too much trouble. It was always a production to get it into the water and after a few years it was for sale.

In the meantime, we have had a few positive canoe experiences. A paddling trip on the Delaware River Water Gap was very enjoyable but it still didn’t convince Tom that we needed a canoe of our own. Not until we borrowed a canoe this past summer and used it on Loon Lake in the Adirondacks did he start to seriously think of buying one. His addiction to Craig’s List came into play and by the end of the summer we were the proud owners of a canoe. My request was that before taking it to the Adirondacks we take it for a paddle on the Erie Canal.

Lo and behold, my dream of owning a canoe and paddling on the Erie Canal was finally realized this past week-end. For about 45 minutes on Sunday morning we paddled along the canal. The water was as smooth as glass and the fish were jumping all around us. It was a wonderful experience.

Was preparing myself physically for paddling a canoe on the Erie Canal the challenge? No, the real challenge was convincing my husband over a span of 15 years to give it a try! So plant your own seed and have patience. You just never know.

Sunday, May 23, 2010

Hanging Tomato Plant


All danger of frost has passed in the Finger Lakes! How we wait to reach that landmark time of year Now it's time to plant a garden. Last year I decided to convert my never-very-successful deck landscaping into a vegetable garden. The garden was a moderate success producing a few meals of beans (yellow, green and purple), plenty of zucchini, a few green peppers and some cherry tomatoes. Not really much of a crop to claim, but I loved the idea of a garden nonetheless. For at least a little while I could pretend that organic really meant something to me!

Last year, I started my seeds inside. I planted much more than I needed and transplanted much more than I needed, as well. I think one of the reasons for my small crop was that I overplanted the garden. I just couldn’t bear to “destroy” my little seedlings. By the end of the season I realized that I hadn’t done myself any favors because the plants were too crowded to produce. This year I decided to let someone else do the seedling nurturing thing. Maybe if I don’t become so attached, I won’t have any trouble thinning plants out when needed.


It was the perfect week-end for planting so I headed up to my favorite farm market. It was an absolute feast for the eyes. I tried to keep myself focused on vegetables but got a little distracted with the hanging baskets. Oh well, I did need those, too! I brought home zucchini, a roma tomato, a grape tomato, yellow and red peppers and cubanelle peppers. On second thought, I returned to the store the next day and bought some eggplant and a variety of herbs.

My experiment this year is to plant tomatoes and peppers upside down. You may have seen the topsy turvy tomato planter. This planter claims that water and nutrients move directly from the root to the fruit increasing production. I don’t know anyone who actually had any success with this planter, but a friend of mine claimed great success with planting in five-gallon buckets. His claim is that the larger sized bucket and the heavier planter protect the plant roots resulting in a no-fail crop.

Up for the challenge, I decided to give it a try. I planted my two tomato and three pepper plants in their own buckets. Tom acted as my technical director and the process went very smoothly. It's been about six hours and the plants have not fallen out of the holes. I have high hopes for success. Planting in the buckets did free up a little bit of space in my small garden and I am looking forward to a full “30 pounds of fruit” (according to topsy turvy) from my planters. I’m also hoping that my pesky woodchuck foe will not be able to reach my new plants. I’m not sure how much wood a woodchuck can chuck but I do know how many zucchini he can eat!

Sunday, May 16, 2010

Book Sales


I have been a voracious reader since I was very young. I’m sure this trait is inherited from my mother who always found time at the end of her busy day to lose herself in a little good fiction or thumb through a magazine. We were not lucky enough to have a library in our small community so we made good use of the school library when school was in session. In the summer, mom made sure we got to the Bookmobile whenever it was in town. I think the Bookmobile is the coolest thing ever and took my kids to one once just so they could experience a library on wheels.

As I relocated from one community to another, finding the library was always a top priority. I read so many books (2-3 per week) that it just didn’t make sense for me to buy them. Besides, a box filled with books makes a pretty heavy load as we averaged a move every two years or so. Checking books out of library was like shopping with no money.

I have continued to use the library through the years, although recently I have noticed that I do not get through my books quite as quickly and I am more often than not late in returning them to the library. I am constantly paying fines for keeping my books past the due date. I always think that if I had just one more day I could finish. I never leave a book unfinished even if I don’t particularly care for the story. If someone took the time and energy to write the book, I don’t want to insult them by leaving it unfinished. It’s like leaving a performance early which is very rude, not to mention disrespectful.

As a result of my continued tardiness in returning my books, I stopped going to the library and relied on friends and family to pass their books on to me. Unfortunately, my reading supply was sporadic and my taste was not always compatible with theirs. Then, one summer, I stumbled across a book sale as part of a festival. Not knowing what to expect, I walked into a room filled wall-to-wall with books. The price of the books ranged from $.50 to $1.00. A book lover’s paradise! I was hooked.

Recently, I caught the tail end of a book sale. This is the point when they just want to get rid of what’s left and charge $2.00 for a bagful of books. I fit nine books into my bag. When I added up the prices listed on the book covers it came to just under $200. I checked the titles on amazon.com and they totaled just under $125. Wow, makes me glad I paid $4.00 for my bag instead of just $2.00! The titles left at the end of a sale may not be best sellers or even very recent, but every book is worth a read as far as I’m concerned.

If you like to read and are flexible with your reading material, do yourself a favor and check out your local book sale. You’ll be doing everyone a favor, especially yourself.

Sunday, May 9, 2010

Coffee Body Scrub


I love body scrubs. They do a great job of exfoliating dry skin and exposing wonderfully soft skin as well as coming in a variety of delicious scents. I always thought of them as a frivolous luxury because a good scrub can be a little pricey and don’t buy them often for that reason. Therefore, when I came across a recipe for a homemade body scrub in my recent issue of Body and Soul Magazine I decided to give it a try.

The recipe called for common ingredients including ½ cup of used coffee grounds, ½ cup of honey and 1 tablespoon of orange zest. It seemed like a simple recipe and I had no problem coming up with the ingredients. I grabbed the used coffee grounds from work. As you can imagine, there was quite a fight about who would take them home, but fortunately I won out for the sake of science. I bought a store brand honey for $2.29 and had an orange in the fridge. An inexpensive recipe is always appealing to me.

I was curious about the reason these ingredients were chosen for the recipe so I did a little research. I was amazed what I found out about the effects of coffee on the skin. Apparently, when coffee is applied directly to the skin it redistributes fat cells and therefore decreases the formulation of cellulite. The caffeine in the coffee scrub also acts as a vascular restrictor, shrinking blood vessels and helping to reduce varicose veins. More importantly, recent studies on laboratory mice indicate that when caffeine is applied directly to the skin it can prevent the occurrence of skin cancer caused by UV radiation. I love to drink coffee but had no idea of what else it had to offer.

As for the honey, apparently it is an antibacterial that acts as a moisturizer as well. Honey hydrates and softens the skin. It is also is good for acne prone skin as it inhibits the bacterial growth and therefore reduces the chance of breakouts. Of course honey is made with only natural ingredients and is rich in nutrients like vitamins B and C. The antioxidants found in honey benefit the skin and prevent it from the effects of premature aging. I had no idea.

I mixed the ingredients together very easily. The scent of the coffee with the orange zest was simply amazing. I filled up the bathtub with warm water and was ready to give this scrub a test run. I was a little concerned that the honey would make the scrub sticky but this was not the case. I applied the mixture in a vigorous circular motion. I was a little over zealous and it was pretty abrasive but it felt good. Note to self: go a little easier next time. I left the scrub on for a little bit to get the full effects of the caffeine. As soon as I rinsed the it all off, my skin felt amazing. The coffee scent did not stay on my skin and I moisturized as usual with no clashing of scents.

I cannot say enough about this homemade coffee body scrub. Given the exfoliation qualities of this recipe as well as the benefits of the ingredients and the price, I will definitely continue to use this body scrub and would recommend that you give it a try as well. As an additional tip, I would suggest that you use a coffee filter over your bathtub drain when you are through because all those coffee grounds cannot be good for anyone’s septic system. Enjoy!

Sunday, May 2, 2010

Public Transportation


Growing up in the country, there really weren’t many opportunities for me to take advantage of a public transportation system. With the exception of the school bus, I was able to get wherever I needed to be by car. When I went away to school I began to use the Greyhound bus service to get back and forth from Plattsburgh to Albany. It certainly was a culture shock to be dropped at the bus terminal in downtown Albany in 1977!

During my time in Albany, I started taking a bus to do my grocery shopping. As anyone who has grown up in a rural environment knows, you buy food for at least a two-week period. It didn’t occur to me until it was too late that I would have to carry all those bags onto the bus and then walk from the bus stop to my apartment. I still remember the ache in my arms by the time I got home. I didn’t make that mistake again. I had another opportunity to take advantage of a bus service in Philadelphia a few years ago when Erin and I were visiting. We had a short distance to travel and were told the bus was the best way to get there. Wow. First the bus was late getting to our stop and then it left us off in the middle of nowhere. I think I’ll leave bus travel to others from now on.

In recent years, I have been taking advantage of travel by train. The train is such an easy, comfortable way to travel. It takes a bit longer than driving but the seats are comfortable and the stations are easy to get around, not mention beautiful examples of architecture steeped in history. I remember my parents taking the family on a train from Plattsburgh to Ticonderoga so we could experience travel by rail before it became obsolete. Now the state of New York is vying for federal funds to create a high-speed train service. Apparently trains aren’t going anywhere soon.

I recently took a quick trip to New York City. I drove the first leg of the trip to Erin’s apartment which is near New Paltz. Our plan was to take the commuter train into the city. We knew that the parking lot for the commuter train would be very crowded on a weekday so we took advantage of a shuttle bus which took us straight to the train stop. This was great because we didn’t have to worry about parking and walking across a large parking lot in the rain. After about an hour and a half we reached Grand Central Station. Within minutes we were on the streets of NYC ready for our day none the worse for wear.

While I wouldn’t want to make that commute every day, it’s a great way to travel for an occasional visit. Travel by train is a definite improvement over taking the bus and I highly recommend it. Give it a try and good luck with your travels!

Sunday, April 25, 2010

Space Bags


I decided to take that leap of faith today and believe that warmer weather is really on the way by switching out my winter clothes for my summer clothes. This is always a chore, both physically and mentally as I wrestle with myself about packing my sweaters away for the season. Is it really going to be warm enough?

The first step in the process is to sort through my dresser drawers and closet creating three piles of clothes. The “keeper” category speaks for itself. These are items that I really like and that fit my lifestyle. The second category includes the clothes I have not worn this year and most probably not last year either. This category contains clothes I either bought on sale or were gifts that really don’t suit me. It’s a tough category because most of the clothes are fairly new, causing me to feel a little guilty about passing them on. The third category is easy. These are the clothes that are just plain worn out. You know the type.

Once all the decisions are made, it’s time to find alternative living solutions for each category of clothing. Now that my daughters have moved to their own places, I get to use their closets. I don’t know what I ever did without that space. Maybe I should be a little more ruthless with the category #2 clothes but what if I need to dress like a grown-up again someday and need my old suits and dresses? I guess I’ll just wait until they are hopelessly out of style before parting with them.

On the advice of a friend, I decided to try the Space Bags to store my sweaters and anything else that folds nicely. The concept of these bags is great. You fill the bags with whatever; close the zip lock and the vacuum out all the air. The bag compresses and becomes quite firm and easy to move around. The bags can be easily stacked wherever you store your clothes. That’s the good news. The bad news is that they don’t hold their seal. After about 15 minutes, the air had leaked back into the bags. I resealed them and tried again, but to no avail. Well, the bags are made out of a sturdy plastic and will still be useful for storing clothes whether or not they hold a seal.

The job is done and it’s nice to see the light spring colors hanging in my closet and stacks of t-shirts in my drawers. I’m ready for a nice warm spring and a wonderful summer. Note to self: Stop shopping so I won’t have to worry about where to store my seasonal clothes.

Sunday, April 18, 2010

T-Shirt Necklace


All my April magazines featured “green” ideas for Earth Month. I feel pretty good about incorporating earth-friendly ideas into my everyday life. Although I have a way to go, I think I’m doing pretty well. I use my own tote bags for grocery shopping, I have CFL’s in all the lights that stay on for any extended period of time, I have a HE front loading washer and I wash all my laundry in cold water. I’m making a gradual switch to green cleaning products, use paper towels very sparingly and grow some of my own pesticide-free vegetables.

I have also increased the amount of “stuff” that gets recycled rather than thrown into the dumpster and am a great recycler of clothing by donating whatever I cannot use or turning them into cleaning rags. I found the t-shirt necklace featured in Body and Soul Magazine quite intriguing as a new use for old t-shirts and being in an eco-friendly state of mind, decided to give it a try.

The directions for the project are quite simple, although gathering supplies may not be. The first step for me was to find an old t-shirt. Now who doesn’t have an old t-shirt hanging around? Well, me for one. Because I donate all my unused clothing, an old t-shirt was not to be found in my drawers. After a bit of a search, I found a pink t-shirt in my daughter’s room. I hope she won’t miss it!

Next I needed to find scissors. I don’t know what it is about scissors in my house, but I can rarely find a pair when I need them. My search ended in the garage where I found my good sewing scissors covered in dry wall compound. I guess that’s my fault for leaving them out in plain sight. I washed them off as best I could but I think it’s fair to say that they are not going to be much use to me any longer. Fortunately, my mother had given me a nice rotary cutter which was ideal for the job.

Once you find your t-shirt and scissors, you are ready to start. Honestly, it took me longer to find the supplies than it did to complete the project. Cut the hem off the shirt and measure out 20, ¾ inch strips up the shirt. I used a women’s medium shirt so this measurement took me right up to the arm seam. After cutting 20 strips, hold one seam in each hand and pull. This stretches the fabric and forms the strips into little tubes. Pile all the strips together, twist them in a figure 8 and use a six inch strip of the shirt to wrap around the back to secure. It’s really that simple.

I think the end result is really pretty cute. I would suggest that if you decide to make your own necklace that you use a shirt larger than a women’s medium or make sure you put the necklace on before you apply your makeup. Otherwise, your make-up will end up on your necklace as it's a pretty tight fit going over your head.

Actually, I’m not sure I would call this project a necklace as much as a scarf. I think it has great potential as a nice summer-time scarf that can help to hide the skin of an aging neck. I don’t know about you, but I can’t wear a turtleneck all summer long.

Sunday, April 11, 2010

Pierogi


I enjoy reading through my issue of Martha Stewart Living each month. Martha’s ideas for making the ordinary extraordinary are truly inspirational. She makes everything look so easy and wonderful. The latest issue of her magazine featured an article and recipe for pierogi. The glossy pages of the magazine showed some beautiful pictures of the pierogi-making process and the end result. I was tempted to try but the article said they were tricky. If Martha admitted something was tricky it would certainly be too much for me.

As I was catching up on the shows on my DVR, I came across an episode of Martha making pierogi with her nieces. It didn’t look that hard to me and they all just raved about how much they loved them. Feeling up to the challenge, I pulled the issue out of the recycling bin and decided to give it a try.

A pierogi is actually a dumpling. The outside is dough and the inside can be filled with cabbage, potato or a variety of fruit. The potato pierogi seemed like a good choice for dinner. The dough was a very simple mix of flour, egg, milk and water. After kneading it for the required 8-10 minutes, the dough was ready to “rest”. I was the one who needed the rest; kneading dough is the perfect exercise for arms and abs. I know I’ll be hurting tomorrow!

With the potatoes cooked and mashed with cream cheese and butter and the dough rolled to perfection, I was ready to start assembly. Three inch circles of dough were filled with the potato mixture, crimped and then dropped into a pot of boiling water. They looked just like the picture. Well, close enough anyway. When they were finished, I fished them out of the water and set them on a plate with butter. I drizzled browned butter on the top and was ready to give them a try.

Let’s just say that boiled dough is not my thing. The filling was very tasty but the consistency of the dumpling bothered me. Even though I only made half of the recipe, I have many pierogi left to eat. I think tomorrow I will deep fry them to crisp up the soggy dumpling part. Fried pierogi, I hope it’s a good thing!

Monday, April 5, 2010

Happy Easter, Happy Spring


I just love Easter. No matter what the temperature is, the day feels like the real beginning of spring to me. We were lucky this year and had a few days of nice warm weather that made the daffodils bloom. I think I could actually see the leaves erupting from the trees and bushes these past few days and the grass is so green. It was truly a wonderful spring day.

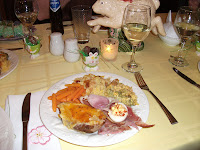
I especially like Easter dinner. The food is so light and refreshing compared to the holiday meals during the fall and winter season. My sister hosts Easter dinner every year. We’ve fine-tuned our menu over the years, adjusting for the number of people who will be attending. She cooks the ham, twice-baked potatoes, bread and broccoli casserole and I bring the hors d’oeurvres, devilled eggs, pineapple stuffing and dessert. Out comes the old recipe box as I plan what to bring as my contribution.

After all these years, there are still cooking techniques for me to learn. I thought I had making devilled eggs down to a science. Enter Rachael Ray with a new technique: cover the eggs with cold water, bring the eggs to a boil, cover and remove them from the heat. After 10 minutes you have perfectly cooked eggs. In the past, I boiled the eggs for about 10 minutes and there was always at least one that would crack and run. Who knew? Filling the eggs is always fun. I am lucky enough to own a Super Shooter Cookie Press that has a star attachment just for fancy fillings. This cookie press is electric and is no longer in production. I’d better take care of it. I may learn new cooking techniques, but it just would feel right if I couldn’t fill the eggs with my Super Shooter.


My dessert recipe is one I haven’t made in quite a while: lemon bars. As I was shopping for the ingredients, I found a box mix and was very tempted to use it instead of baking the squares from scratch. I’ll have to try them some day, but didn’t want to take a chance at a holiday dinner. I used real lemon juice and added lemon zest to the original recipe. After baking, cooling and cutting, I melted some chocolate and drizzled it over the top of the squares. They were very yummy and disappeared pretty quickly.

The entire meal was delicious and the company was wonderful. I have to admit, though, I much prefer having dinner at someone else’s house. No house to clean, no extra dishes to wash, no table linens to coordinate. Dinner at Julie’s house, it’s a good thing!

Sunday, March 28, 2010

Watercolor Painting


I have long been a fan of the art of watercolor. Watercolor paintings have such a soft, dreamy look. The colors bleed into each other creating less defined edges that allow your imagination to see what is inside the painting and not just what is imprinted on the paper. Not a student of the fine arts, I wanted to learn how to work with colors and blending techniques without having to concentrate on fine details. Not to say that watercolor paintings do not have detail, but I was thinking of painting in a more abstract way.

Although an admirer, I had never tried my hand at this type of painting and when a series of art classes became available at the Phelps Arts Center I decided it was time to give it a try. “The Phelps Arts Center is housed in an 1850’s Gothic structure and is listed on the National Register of Historic Places as a significant example of early English Parish Architecture.” More recently, the building was occupied by the Phelps Community Memorial Library. Now, I ask you, how can you not be inspired to create in a building with that history?

There were three of us in the class which was held in the rear of the building. As visitors would come to view the exhibit in the Arts Center, they would wander back to the classroom and watch us paint as if we were part of the admission price. Now I know how animals at the zoo must feel! Of course one of the students was very good. He had been painting for years and really just stopped by for some tips. Visitors watched him in awe and amazement while they seemed to look at me with pity. You know a quick glance and look away as if they hadn’t looked at all!

The instructor taught me how to wash a paper with color, forming the base of the picture. It was so much fun mixing the colors and watching them blend together on the paper. Apparently most people are a little intimidated by this technique but I jumped right in. No reason to pretend I knew what I was doing or that I should be intimated by my lack of knowledge. My impatience proved to be a problem as I did not let the paper dry before I moved on to the next step. As a result, my landscapes got a little muddy. Lesson learned. I will need to be more patient and cautious as I move forward. It will be fun to paint these pictures again to see how I can make improvements to them.

While I haven’t painted anything “suitable for framing”, I have enjoyed my classes. I am proud of myself for achieving my goal of attending art classes and stretching myself to become more aware of the colors that surround me and how they all work together. So maybe I haven’t painted a masterpiece (yet), but you have to walk before you can run, right?

Sunday, March 21, 2010

Spring Cleaning


I don’t know about your house, but when the sun starts to shine through my windows all I can see is dust and dirty windows. While more sunshine and warmer days bring thoughts of working in my gardens, it also brings thoughts of spring cleaning. Time to shake out the old stale air and let the sun shine in!

While I’m no cleaning guru, I have come across a few tips and products that actually get the job done and save time.

1. Magic Eraser. If you haven’t tried this one, you really should. The Magic Eraser goes from removing soap scum on the shower walls to cleaning those water spots on the window above the kitchen sink. Admit it, you have both! It’s also great for cleaning a solid surface countertop and sink. Just wipe, dry and polish.

2. Dishwasher Detergent. Do you have trouble keeping the textured bottom of your bathtub clean? Tip number two is a 2-for-1 deal. Soak your mini-blinds in a tub of warm water with powdered dishwasher detergent. You get a super clean tub and bright shiny blinds. As a bonus, the strings on the blinds come out nice and white because of the bleach in the detergent. WARNING: Tub may be slippery!

3. White vinegar. Have you ever noticed a white build-up on your bathroom and kitchen fixtures? It’s hard as a rock and extremely difficult to remove. Soak a cloth or paper towel with the vinegar and wrap it around the white build-up. You might need to use a rubber band to keep the cloth in place. Let it soak for about 30 minutes and it wipes right off! Vinegar is also great for cleaning windows. I used to have an awful time trying to wash my windows and leave them streak-free. If you’re going to have streaks, there really isn’t any point in washing them at all. (I’ve used this excuse before!). I mix a little regular dish detergent with white vinegar and warm water to use as a window cleaner.

4. Newspaper. Use newspaper to dry off your clean windows. I don’t know what it is, but the newspaper absorbs the water and leaves a perfectly shiny, streak-free window. The only problem with using newspaper is that your hands get really dirty. Be prepared to wash your hands often so the black ink doesn’t rub off and create a whole new cleaning job for you.

5. Swiffer duster. This little gadget is just the greatest! Dust practically jumps right onto it. Have you ever seen the commercial where the woman is dancing around dusting with her Swiffer? Silly, I know, but I felt like putting on music and dancing along! I must have done a good job because when the sun came shining in this afternoon, I didn’t see any dust.

6. Housekeeper. If all else fails check out Craig’s List for housekeeping services. Sometimes the expense is just so worth it.

Monday, March 15, 2010

Exercise


Okay, we all know we need to exercise. According to Web MD the benefits of exercise include strengthening muscles, keeping bones strong and improving our skin. Regular exercise also increases relaxation, helps us sleep better and improves our immune function. Wow, that’s quite a list! Unfortunately for me, knowing this information and doing something about it are two different subjects entirely.

I have always found one reason (excuse!) or another not to exercise. The work-outs were too hard, the class times were inconvenient, I was too tired, etc. I could go on and on. Maybe you’ve made some of the same excuses. A few years ago I decided to start exploring some exercise options that would fit my lifestyle and help to eliminate the validity of all my excuses.

I joined Curves because they promised a 30 minute routine and had convenient hours. As an added bonus, visiting Curves on a week-day morning with the over-70 crowd makes me feel young and vibrant. Having become an audio book addict, I treat myself to a “fun” book while walking on the treadmill. If I want to listen to my book, I have to walk. Walking along the lakefront during lunchtime also offers an opportunity to increase my activity level.

You guessed it, I’m still making excuses! Some days I have to work late and can’t get to Curves. Other days, the weather is not conducive to an outdoor walk; too hot, too cold or rainy. And the treadmill is in the basement which is not my favorite place in the house.

A lost cause you say? 10 minute workouts on Exercise on Demand to the rescue! I have found a new way to meet my goal of 30 minutes of activity a day 10 minutes at a time. I started with a simple dance routine. While I might not be the best dancer, I thought I was doing pretty well until my performance was compared to Carla’s in the “Other Sister”. I just have to make sure no one is around when I “dance” next time. This morning I tried a kick boxing routine. What fun! Maybe this routine will double as assertiveness training. Two for one all in 10 minutes!

Forever the optimist, each Monday presents itself as another chance to do the right thing. I’m off to Curves this morning to get my inspiration from the over-70 crowd. Hey, if they can do it, so can I.

Sunday, March 7, 2010

Leftovers


Leftover: something that remains unused or unconsumed; especially: leftover food served at a later meal.

I think I’m pretty good at gauging how much food to cook for each meal and as a result I don’t generate a lot of leftovers. But on occasion I do have bits of meat from various roasts left at the end of a meal. Not really enough for a complete meal but too much to drop down the garbage disposal. I like to save these bits and pieces and add them all together to simmer with a barbeque sauce or gravy. Smothered in sauce, you can’t really tell one meat from another.

The problem is that it can take several months for me to save up enough “bits and pieces” to make a meal. I have been storing the meat in Tupperware containers in the freezer. As the contents of the containers crystallize over time, it becomes difficult to know what food is actually in the container or how long it has been there. And have you ever had a frozen container fall out of the freezer onto the floor? I have, and it isn’t pretty. Either you end up with a broken container or worse yet, a broken toe if you aren’t quick enough to jump to safety from the avalanche of frozen food containers.

FoodSaver to the rescue! I have been looking at the vacuum sealing systems available on the market. These systems seal food in plastic without air which prevents ice crystals from forming on your food. The downside is that they are a little pricey and take up a bit of cabinet space. Enter the FoodSaver system. This is a handy little system that uses plastic bags with little air holes through which the handheld device sucks all the air. There is an area that you can easily record what is in the bag and when you placed it in the freezer. Not only do my leftovers come out in a timely and frost-free manner, but as an added bonus the virtually flat bags stack very neatly in the freezer. I would definitely recommend this product to anyone who uses their freezer to preserve food.

Did you know that we throw away 8.3 million tons of food and drink each year? I won’t be contributing to this number now that I have a FoodSaver!

Sunday, February 21, 2010

Gardening


Such bright, sunny days lend themselves to thoughts of fresh, homegrown vegetables. Though not much of a gardener, I was inspired last spring by Martha Stewart to build a salad table. I saw it on one of her shows and was eager to give it a try. She made it look so easy (of course). The table is constructed to be four inches deep with a fine screen on the bottom so that the water can drain out but the soil cannot. I showed Tom the plans and he built the table for me. We laughed because the materials cost more than any crop I could hope to harvest but I thought it would be fun.

Because salad greens like the cooler weather, I planted my crop of basil, spinach and leaf lettuce in mid-May when all chance of frost was past. I nurtured the seeds by routinely watering, feeding and thinning them. If I thought the night would be too cold, I covered them. Soon I had little seedlings. I thought I was doing pretty well until a friend told me that he had been eating his own spinach for weeks. How disappointing. Even though my crop was late, I held on until all hope passed sometime in July. No fresh salads for me! You can see the ill-fated salad table above.

I bought some basil plants for about $4 and enjoyed eating from them all summer long. I enjoyed the basil so much that this year I decided to get an early start and grow some basil plants inside. I planted the seeds and placed the planter under a grow light. Again, the seeds began to sprout. Today I transplanted four little seedlings into a larger pot. Their stems are a little weak so I propped them up with little sticks. The directions say to let a fan blow on them for two hours every day to simulate outside conditions. I’ll have to give that a try even though it seems like I’m racking up quite an electric bill for the pleasure of a few leaves of basil.


But how can you measure the pleasure something gives against its cost in dollars? It’s not really the basil itself that matters to me; obviously I can buy basil anywhere. It’s the satisfaction of having succeeded in producing it myself. What’s the expression? "Give a man a fish; you have fed him for today. Teach a man to fish; and you have fed him for a lifetime.” Here’s to a lifetime of fresh basil pesto!

Thursday, February 11, 2010

Volunteering


I have always been a fan of volunteering. Moving around as we have, it was always a good way to get involved in the community and to meet interesting people. The trick to a successful volunteer experience is to find an organization/project that interests you and just go with it.

I began my volunteer career in Shaftsbury, Vermont at the Peter Matteson Tavern. I wore an 1800’s costume and learned to spin and weave as well as to make lace. I was called upon to conduct a few tours but I wasn’t very good at it and felt badly that people had actually paid for one of my tours. You know what I mean – some tour guides are just so good and some are just not. I was not.

My next volunteer experience was as a literacy volunteer. I was living in New Jersey where there was a very diverse population of non-English speaking residents. I worked with a young woman from Puerto Rico. She spoke English very well but needed help interpreting insurance documents, etc. Now really, can anyone figure these things out? This experience gave me a new respect for anyone who could speak a second language and function in another country.

Next stop, the Girl Scouts. I spent many years as a troop leader as my girls grew up. I met a lot of really nice people and I was able to use my planning skills to the extreme. No meeting went without a themed craft project and “lesson”. Okay, maybe I got a little impatient every once in a while and showed my “crazy mom eyes”. But I didn’t lose many girls along the way, or wait; maybe it was the free babysitting service.

I think my old classmates will get a chuckle out of learning that I was also a softball coach for a few years. In school, I was always the kid who ran to the outfield because I could not throw a ball to save my life and there was rarely any action that far out. I still feel bad for the Phys Ed teacher. She was so tolerant of my “girly” behavior. Anyway, a softball coach was needed and I stepped up. It was very stressful being a coach. I remember getting calls from parents admonishing me for taking their daughters out of the game. I thought I was being kind by not letting the girls humiliate themselves. Different perspective I guess.

After my daughters were both out of school, I decided that I needed a break. I felt drained and burnt out. Volunteering does take a lot of time and energy even if you do enjoy it. I took a few years off before starting to feel guilty for not “giving back” to the community.

This brings me to my latest experience. As part of my year of challenges and goals, I volunteered to work for a charity auction in the small city where I work. The auction is held every year to help raise money for the Christmas decorations that go up in the downtown area. I have to admit, I wasn’t much into soliciting donations for something as frivolous as Christmas lights when other organizations were trying to raise money for food and clothes for the disadvantaged. At best, it was a half-hearted effort on my part.

Imagine my horror when I was presented with an Volunteer Award for Outstanding Service. What an ingenious idea! Make your volunteers feel really bad about their lackluster performance so they will come back and try even harder the following year. I would recommend this technique to any organization that is dependent on volunteer labor. What choice do I have now but to sign on for another year so that I can prove myself? Would anyone like to donate to the 2010 Light Up Geneva Auction? I’ll be giving you a call.

Saturday, February 6, 2010

Real Simple Solutions


I was flipping through the February issue of Real Simple magazine and came across a feature called Ideas, Insight, Inspiration: 8 New Uses for a Tennis Ball. Are you kidding me? This had Challenge written all over it! Now I happen to have a tennis-playing daughter so I have a bucket full of tennis balls in my garage. But are tennis balls something that the majority of people have just hanging around their house? Hmm, I wonder.

#1 – Bulb Remover: Use half of a ball to remove a warm light-bulb from its socket. I cut my tennis ball in half (according to package directions!) and attempted this trick. The ball did not fit over the light-bulb. It did, however, provide enough of a grip to loosen the bulb but I had to use my fingers to actually remove the bulb. Maybe I was supposed to loosen the bulb and let it fall to the ground. Score: C

#2 - Comforter Fluffer: Speed up the drying time of bedding by tossing a couple tennis balls in the load. I’ve tried this over the years with a comforter or down coat without success. The tennis balls get tangled up in whatever is drying or just bang around in the dryer. Maybe it works for someone else. Score: D

#3 – Arm Weights: Cut small slits into two balls and fill with pennies. The filled tennis balls weighed about 1 lb. each. I walked for 30 minutes on the treadmill with them. I get the point (pump your arms for an extra cardio workout) but my hands cramped a bit trying to hold onto the balls. I’m thinking that if you can buy tennis balls and fill them with pennies, you can afford to buy some inexpensive hand weights. The bonus to this tip may be that if you are out walking and get thirsty, you can stop at the store and use your pennies to buy a drink. Score: B

#4 – Spa Tool: Roll sore feet over tennis balls. I have been on my feet a lot this week and this one actually felt pretty good. The tennis ball worked the sore muscles in the bottom of my feet and relaxed them a bit. This doesn’t replace a good foot massage but then tennis balls are pretty cheap. Score: B

#5 – Jar Opener: Use the rubber lining of a cut ball to aid your grip. I suppose this one would work well if you found a jar top that was the size of your tennis ball. I tried this on tops that were smaller and larger and it didn’t work at all. Score: C

#6 – Makeshift Safe: Slice a tennis ball and place valuables inside. You’ve got to be kidding me! If I have anything valuable enough to hide, I wouldn’t hide it inside a tennis ball. This is just plain silly. Score: C

#7 – Floor Guards: Cut an X into four balls and slip the feet of an ironing board inside. The ironing board pictured above was a wedding shower gift from my grandmother. It is still is good shape except that it has lost a plastic protector on one of the legs. This may be a humiliating look for the ironing board, but it actually works for me. I’m going to keep them on and see how it works out. So far, so good. Score: A

#8 – Painkiller: Lie down. Place a tied sock containing two balls under the spot where your head and neck meet. Tuck your chin and gently nod your head up and down. I have trouble with my neck so I harbored some hope for this one: PAINFULL! Score: F

How many times do you read these kinds of tips in magazines and then just put them out of your mind? Admittedly, some of the suggested uses for a tennis ball were a little lame, but then some of them actually worked. Check out Real Simple magazine at www.realsimple.com for these and other clever ideas. Let me know if you have any valuables to hide and I'll send you a tennis ball.

Monday, February 1, 2010

Paper Making


I have been creating scrapbooks and cards for several years now. As any scrapbooker will tell you, this craft generates a lot of paper scraps. I have saved all my scraps from various projects over the years. You just never know when you will need just a little bit of something. I also like to pick up a variety of papers for use in future projects. You may be surprised to learn that paper styles and colors go out of style fairly quickly. How else could paper companies sell more paper?

As a result, I have amassed quite a selection of papers over the years. Not wanting to throw them away, I thought I would start to create my own papers. The first step was to sort the papers out by color. It turns out that I have a lot of brightly-colored card stock. Not sure how I will use them, but I’ll worry about that later. Several papers are multi-colored so I put them in piles by their predominant shades.

The paper making process requires the use of a blender. I have been through a few blenders over the years and didn’t currently own one. I paid a visit to my local Big Lots and found a Hamilton Beach blender for a good price. (I’ll have to try it out on margaritas for Cinco de Mayo as a true test.) With Valentine’s Day on the horizon, I decided to make pink and red paper. I tore up scraps of paper that included solid pink and pink-based papers. The blender was filled about halfway with paper and the rest with water. I let the paper soak for about 10 minutes and then blended it on high speed for about a minute. The resulting pulp was dumped into a plastic tote. I added two pitchers of water for each pitcher of pulp.

The result of all this mixing was a tub of light pink pulp. I assembled my deckle and screen and dipped it into the pulp, lifting it up and draining. I then sponged off all the water I could by gently squeezing and pressing. I then peeled the new sheet of paper off and placed it on a towel to dry. The pink was pretty but I wanted to add a little more pizzazz by using red. Red is such a strong color that I only used about a quarter of a pitcher of red paper with the rest of the pitcher filled with water. As expected, I didn’t need much of the red to create a vibrant color.

The end result was six pages of new paper from about four full sheets of old paper. This may not seem worth the effort but the positive is that these six pages were created out of a variety of scraps which would otherwise have had no purpose. The new pages are all a nice uniform color and ready to be used in my next project.

Making paper is a little messy but it was a nice activity for a cold winter day. I look forward to experimenting with more colors and techniques. Now I need to find something to do with my newly-created paper. I’ll keep you posted on that one!

Wednesday, January 27, 2010

Coffee: To brew or not to brew?


My parents made coffee every morning for breakfast but I was never interested. That is until I got a new job in my early 20’s. It seems the newest person hired was responsible for washing out the coffee pot at the end of the day regardless of whether or not they drank any of it. Although I vehemently argued the point, I was not relieved of this duty. The last person hired before me had been washing the pot for several years at that point and was more than eager to give up the responsibility. I decided that if I couldn’t beat ‘em, I’d join ‘em! I started drinking coffee and never looked back.

Over the years drinking coffee has become a ritual for me. It has been a nice way to take a break with friends and co-workers and just chill out for a few minutes. The communal coffee pot at work has replaced the water cooler as a spot for conversations. No one is denied time away from their station to indulge in a little brew.

A few years ago a coffee shop opened up just around the corner from my office. I remember the comments before they opened: What will they sell besides coffee? How can they sell enough coffee to be successful? I felt compelled to offer them my support. Every weekday morning for the past two years I have walked to the Coffee House to buy my daily brew. It’s fun to walk in and have everyone know your name!

Unfortunately, buying coffee every day in a specialized coffee shop can get a little pricey. I had been looking at the Keurig coffee brewing system and calculating my savings for the past year but was hesitant to make the switch. After all, this coffee maker wasn’t going to give me a friendly greeting when I walked up to it. The decision was taken out of my hands when I received a Keurig coffee maker and a variety pack of coffee pods for Christmas.

This coffee maker really is convenient. I don’t have to measure out the coffee or deal with messy filters and burned coffee on the warming pad. There are a variety of brews that are really quite tasty. They have organic and free trade coffees which is important to some people. More importantly, I don’t have to wash the coffee pot! I would definitely recommend this coffee maker to anyone who just needs a single cup of coffee on the way out the door. Compared to coffee shop coffee, I am saving $1.50 per cup. Doesn’t sound like much but at the end of the month I will have saved $30.

Although I am saving money and I like my new coffee, I do miss my friends at the Coffee House. I’ll have to stop by tomorrow and say hello. I think I hear a marble mocha mocchiato (with skim milk!) calling my name.

Saturday, January 23, 2010

Knitting


I love hand-knitted sweaters, scarves and mittens. There’s just something so warm and comforting about bulky yarn. Maybe this feeling comes from the mittens my mother used to make for us when we were kids. Mom taught me how to knit mittens when I was young. I was never very good at it but it was very rewarding to take a skein of yarn and turn it into something that could be worn.

This brings me to my next challenge. From time to time (usually in January), I get the urge to knit. I seek out a pattern that seems fairly simple as my skills have not progressed much since I was a kid. My most recent efforts have been in the afghan direction. The picture above shows my latest afghan projects. The red yarn is chenille and it really did end up as an afghan. A very ugly one at that! As soon as it was finished, I tore it apart to destroy the evidence. I recently decided to use this yarn to make a scarf (pictured). It wasn’t too bad until I lost track of my pattern and created several holes across one row. This one will have to go as well!

I have six skeins of the brown yarn which is nicely variegated and bulky. I started afghan #1 with this yarn on straight knitting needles and it was way too cumbersome with 108 stitches across. I tore it apart. I restarted the pattern on some circular needles but they were too weird. I tore it apart. I started to think that there must be more to my problem than the materials and the pattern. I looked deep within my soul and decided that an afghan using six skeins of yarn and 108 stitches in one row is way too much of a commitment for me. Enter the scarf. A scarf is the perfect project for someone with commitment issues.

I found a basic scarf pattern from Martha Stewart and it was really quite manageable. I worked every evening this past week and voila: a scarf is born! I will call this project an afghan for my neck. As for the rest of the yarn, I saw an ad in the paper requesting donations of yarn for senior citizens. I think I’ll give them a call.

Saturday, January 16, 2010

Maple-Nut Granola


Challenge: Can I make a granola that is tasty and healthy?

I have always been a fan of granola. It’s a healthy mix of oats, nuts and fruits and I love to sprinkle it on my yogurt and pretend that I’m a healthy eater. I have been buying different varieties of granola at the local farmer’s market but with the market closed for the season, I thought I’d try my hand at creating my own.

The January issue of Everyday Food Magazine included a recipe for maple-nut granola that looked pretty simple. The recipe includes old-fashioned rolled oats, chopped pecans, chopped almonds, vegetable oil, maple syrup and vanilla. I received some “real” maple syrup for Christmas and thought I would put it to good use.

The process was really pretty simple; I mixed all the ingredients and spread them out onto the baking sheet. It only took about 10 minutes to assemble and mix. The trickiest part for me was trying to figure out when it was done baking. Consider this: when all the ingredients were mixed, the oats were a golden brown. The instructions say to bake until the oats are golden brown. Hmm, a puzzle. In the end, I may have overcooked it a little but it was very tasty and crunchy. I think that next time I make this recipe I will add some dried fruit like cranberries or raisins.

This was definitely a success and I would recommend this recipe to anyone who likes granola. Or, why take a chance? I noticed that Well Dressed Foods (http://welldressedfood.com/) also has a maple walnut granola. I wonder if it’s as good as mine.

Tuesday, January 12, 2010

GPS: Friend or Foe?


I have to admit that I have always been “directionally” challenged. I’m one of those people who can turn around in a room and be totally lost. Not that this handicap has stopped me from driving wherever I wanted to go but it usually takes me a bit longer to get there. Surprisingly enough, I always led the caravan on Girl Scout trips. We always turned around at least once. What a leader!

You can imagine my excitement when the personal GPS units came on the market. Finally, directions to wherever I wanted to go. No more planning for that extra hour or so for “lost” time. Of course I have heard the funny references to the unit directing people into lakes, etc. Hmm, I’m not so sure. This brings me to my recent adventure.

Hilary and I set out from her apartment in Fairport to visit the Rochester Museum and Science Center. The directions were easily found listed under the museum section in the GPS information center. We were off, feeling pretty confident. We found our exit and first few turns without a problem. As we got closer to reaching our destination, the unit appeared to be directing us to turn down a dead end street. I couldn’t believe this was correct and tried to get the unit to recalculate several times. This meant several turns around the block on snow-covered streets with cars parked on the street. It was pretty tight.

After two or three times around the block, I decided that maybe the dead-end street ended in the parking lot of the museum. Stranger things have happened. When we got to the end of the street, there was a chain link fence. And lo and behold, the museum was just on the other side! Now technically, the GPS did get us to our destination we just weren’t willing to take the extra step and scale the fence.

We did end up finding the parking lot for the museum but the exhibit was sold out and we were turned away. I wonder if I had told my harrowing tale if they would have let us in. After all, the street did look pretty scary.

Friday, January 8, 2010

New Year's Resolutions (Challenges)

January is a fresh start to the New Year. I always think of January as a time to review the past year and figure out what was good and what was not so good. I like to challenge myself to be more creative, better informed and of course more physically fit. Pushing myself to step outside my comfort zone is always on the list!

This past year, a friend and I decided that we needed a little more culture in our lives. Our goal was to attend an “artsy” event each month throughout the year. We went to concerts, art shows and lectures that we would not ordinarily have attended and had a great time, even though some of the outings ended up being a little weird. I learned how much fun it could be to step outside “life as usual”. What a great experience. I will certainly continue this challenge for 2010.

I also challenged myself to expand my reading to include classics, biographies and other nonfiction. I got tired of hearing references to classic novels and authors that I had never taken the time to read. In 2009 I experience Charles Dickens, Nathanial Hawthorne, Edgar Allen Poe and Jane Austin, to name a few. I have to admit that I cheated a little on this one and went the audio book route. Close enough, the words are the same after all.

I was not successful on all my challenges for 2009 including being better informed (bad news will always find you according to my mother!), 30 minutes of exercise each day and eating at least 5 fruits and vegetables each day. I did improve in these areas but I will continue to work on these goals in 2010.

My new challenge for 2010 is to stop procrastinating and actually work on some of the great ideas I have come across over the years. This includes clever craft projects, simple recipes and ideas that are reported to make life more organized and efficient. I have created this blog as a tool to hold myself accountable to actually following through on this challenge.

I invite you to follow along and keep me on task. If you have any projects you would like me to test, please let me know.

Happy New Year to you all, I hope you have a challenging and successful year!